Thinsulate Van Insulation Kit: The Simplest Solution for DIY Van Builds
Insulating your van can be a complicated process, but not with Thinsulate kits! These are specifically cut for your model of van, so makes insulating way easier. In this post, we’ll explain how.
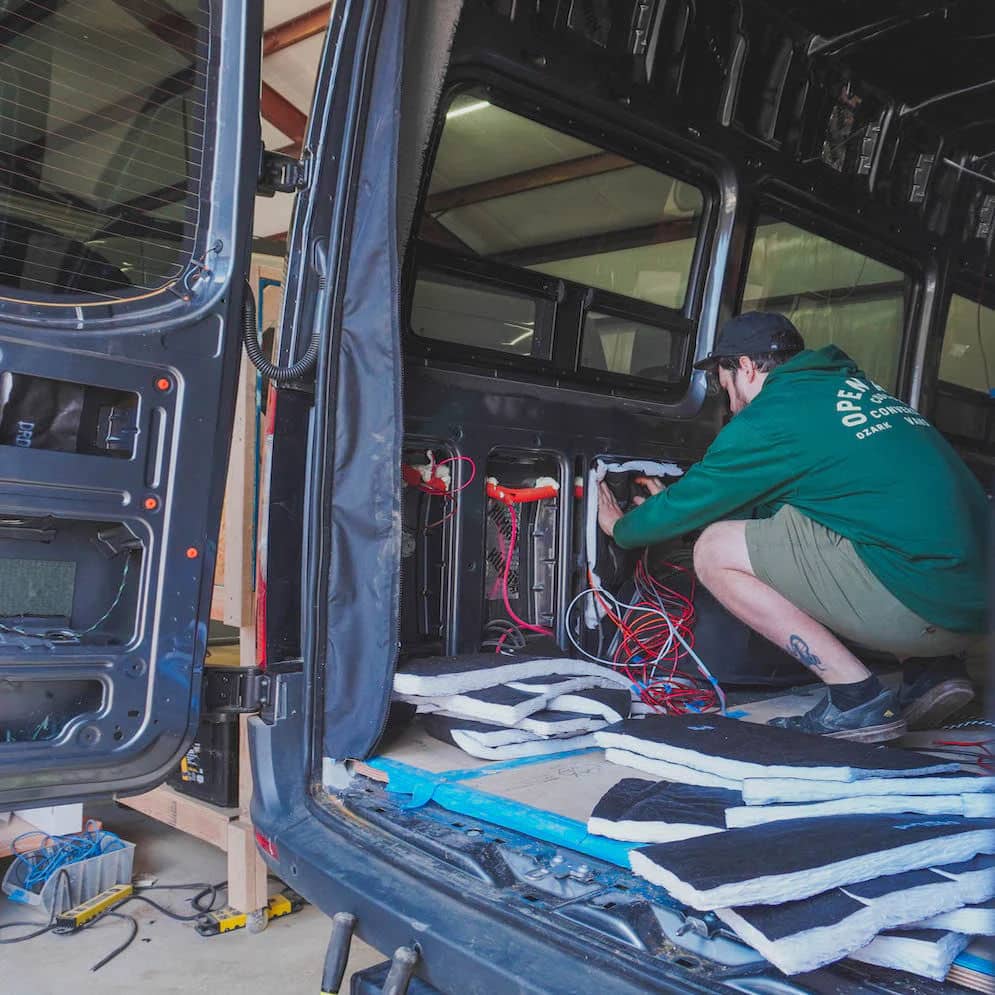
Insulation is crucial in creating a comfortable and energy-efficient living space in your campervan. Choosing the best option for your campervan project can be challenging with a wide range of insulation products on the market.
However, Thinsulate insulation stands out as a reliable and versatile choice, offering numerous benefits over alternatives like wool or foam insulation.
I just learned about this amazing Thinsulate insulation kit from Campervan HQ that makes insulating your campervan a breeze!
*This post may contain affiliate links. Please read our disclosure policy for more info.
Thinsulate Kits for Sprinter and Transit Campervans
Campervan HQ just introduced their new Thinsulate Kits designed specifically for the Mercedes Sprinter van and Ford Transit campervan conversions.
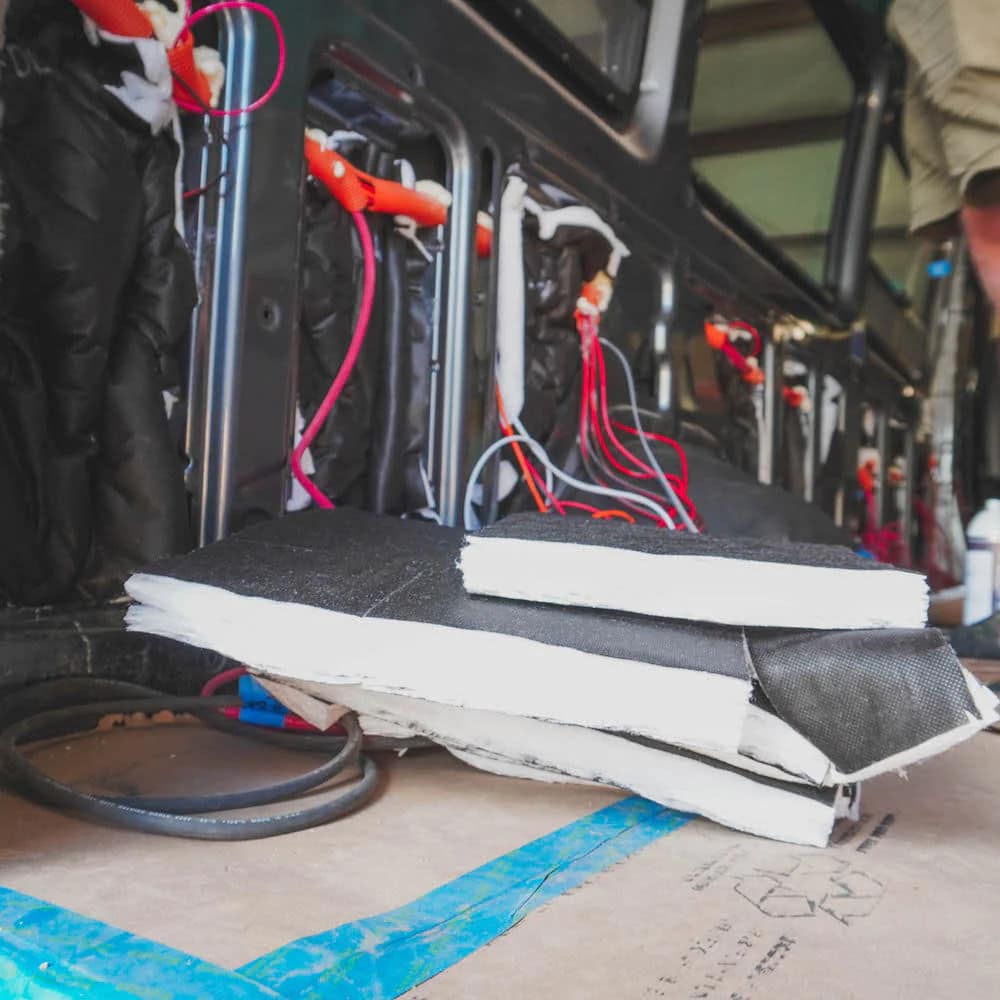
These CNC machine-cut kits have been thoughtfully crafted to simplify and speed up your van build while saving you valuable time and effort. No longer will you have to worry about measuring, cutting, and laboriously installing each piece of insulation.
Each kit has a visual diagram and numbered cut-outs, providing a clear roadmap for the installation process.
Gone are the days of guesswork and frustration. With these kits, you can quickly and effortlessly pop in the pre-cut Thinsulate pieces, ensuring a snug and precise fit.

6 Benefits of Using a Thinsulate Insulation Kit
Thinsulate insulation, known for its exceptional thermal properties and moisture management, will help create a comfortable and energy-efficient living space in your campervan.
Here are some of the benefits of using Campervan HQ’s Thinsulate van insulation solution:
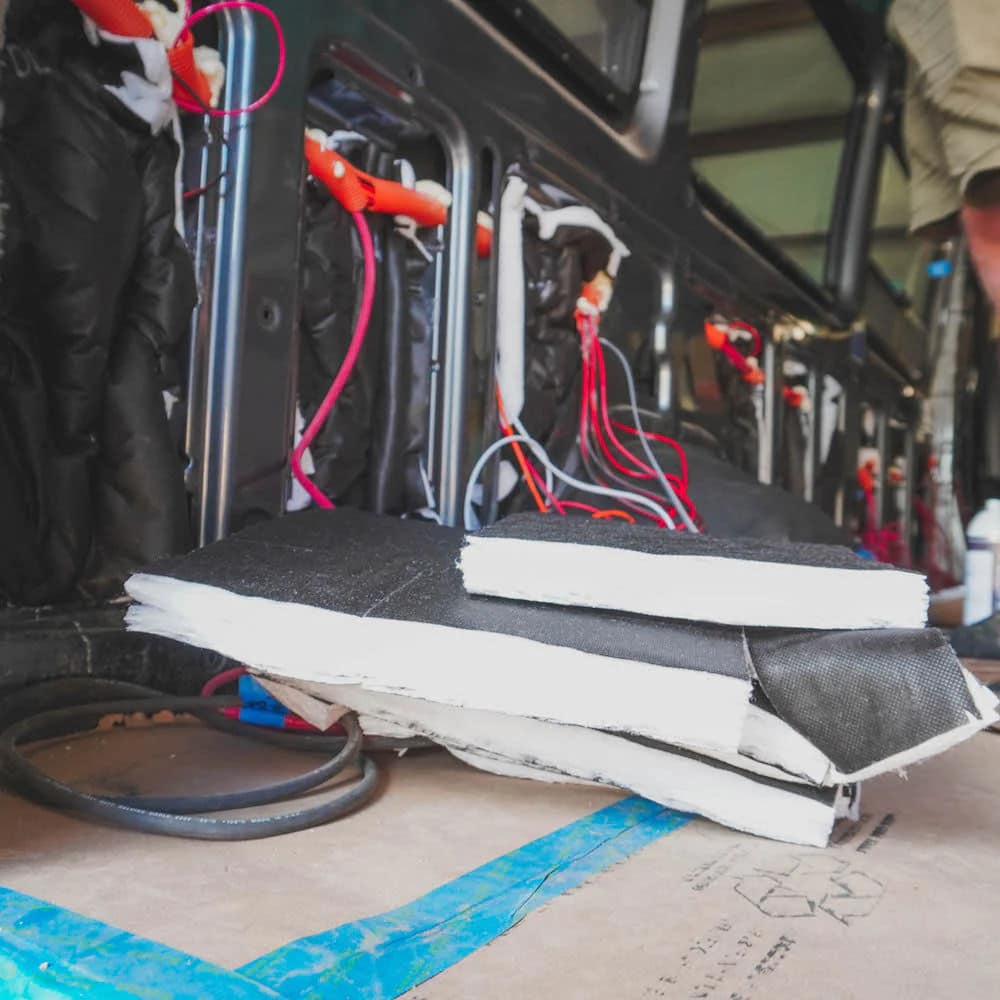
A precut Thinsulate kit for the Mercedes Sprinter or Ford Transit is an easy way to add insulation to your DIY build.
1. Superior insulating properties
Thinsulate insulation is renowned for its exceptional thermal performance. It offers excellent insulation, effectively trapping heat during cold weather and keeping your campervan cool in hotter temperatures.
The microfibers in Thinsulate create countless tiny air pockets, effectively preventing heat transfer and maintaining a comfortable interior climate.
2. Lightweight and efficient
The insulation kit is extremely lightweight, making it an ideal choice for your van conversion build. By keeping the weight of your campervan low, you can enhance fuel efficiency and optimize the load capacity for a more efficient and enjoyable journey.
3. Polypropylene non-woven fibers
Made with non-woven, sound-absorbing fibers that act as acoustic insulation, the insulation kit absorbs and dampens sound waves, resulting in a quieter vehicle environment. Say goodbye to unwanted road noise and engine vibrations.
4. Hydrophobic fibers resist moisture
The Thinsulate van insulation kit is designed with hydrophobic fibers that resist moisture, preventing water absorption and minimizing the risk of mold and mildew growth.
This feature helps maintain a dry and healthy living space, ensuring your campervan remains fresh and prevents offensive odors even in damp conditions.
5. Double black, double embossed scrim
The fibers in the insulation kit are contained within a double black, double embossed scrim. This helps improve structural integrity, ensuring a long-lasting and reliable insulation solution for the entire interior of your campervan.
6. Easy installation
Thinsulate insulation kits are DIY-friendly and extremely easy to install. Since the pieces are pre-cut to exact specifications to fit inside your van, they eliminate the need for complex tools or extensive modifications.
With a Thinsulate van insulation kit, you can quickly insulate your camper van walls, ceiling, and floor without the hassle of manually measuring and cutting insulation rolls.
To affix the Thinsulate insulation to the interior of your van, you can use 3M 90 spray adhesive or something similar.
Watch this video of a Thinsulate van insulation installation in a Sprinter Van:
5 Things to Consider When Selecting Insulation for Your Campervan
When you’re planning to insulate your entire van, there are some essential things to consider when selecting your van insulation solution.
1. R-value and thermal performance
When choosing insulation for your campervan, it’s important to consider the R-value of the material. The R-value measures the insulation’s ability to resist heat transfer. The higher the R-value, the better the insulation’s thermal performance.
Assess your insulation needs based on the climate conditions you’ll encounter during your travels, and select an insulation material with an appropriate R-value for optimal comfort and energy efficiency.
2. Sound deadening
In addition to thermal insulation, sound deadening is an essential aspect to consider when selecting materials for your campervan.
Road noise, engine vibrations, and external sounds can significantly impact the comfort level within your campervan. Look for insulation materials with sound-deadening properties to reduce unwanted noise.
3M Thinsulate is fantastic acoustic insulation, especially for middle to high-frequency ranges, giving you a quieter vehicle environment.
3. Condensation
Campervans are prone to condensation buildup due to temperature differentials between the interior and exterior environments. This can lead to moisture-related issues such as mold, mildew, and rust.
Choose an insulation material with good moisture management properties to prevent condensation buildup and ensure a dry and healthy living space. Thinsulate insulation is designed to resist moisture and allows for efficient moisture vapor transmission.
With 3M Thinsulate, you won’t have to worry about moisture seeping in as it has exceptional moisture resistance. The material is resistant to mildew growth, which helps minimize the chance of unpleasant odors. Installing an extra waterproof vapor barrier is unnecessary when you opt for 3M Thinsulate.
4. Weight and space efficiency
Your campervan’s weight and space constraints are always a consideration for all aspects of your van conversion.
Lightweight and space-efficient insulation materials, like Thinsulate, are ideal for maximizing usable space and minimizing the impact on your campervan’s overall weight capacity.
5. Fire safety
Prioritize fire safety when selecting insulation for your campervan. Look for materials that are fire-resistant or have a high fire-resistance rating.
Ensuring that your insulation does not pose a fire hazard is crucial, providing peace of mind during your adventures. 3M Thinsulate insulation is certified to FMVSS 302 standard for fire resistance.
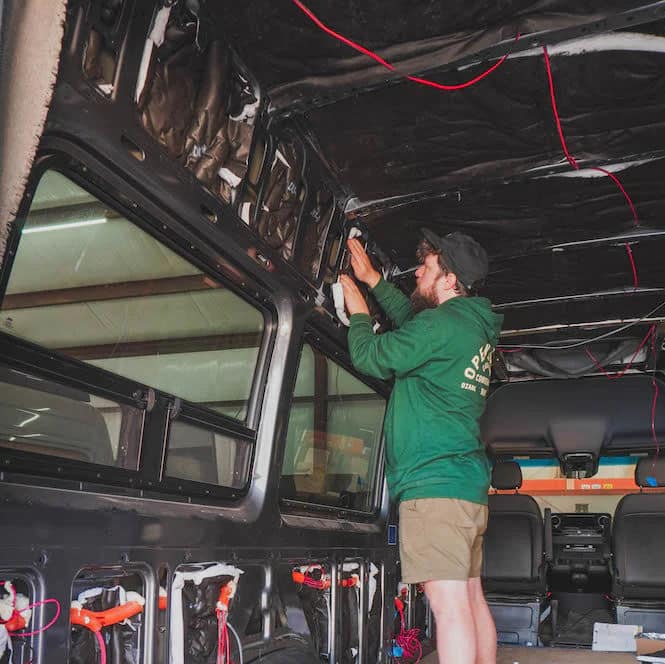
Why Choose Thinsulate Insulation over Wool?
If you’re curious why someone would opt for Thinsulate insulation instead of a natural product like wool, here are a few things you might not have considered:
- Thinsulate hydrophobic fibers resist moisture, helping to mitigate condensation and maintain a dry interior environment. This reduces the risk of mold and preserves the longevity of your van conversion.
- Thinsulate takes up less space than wool insulation while providing optimal thermal insulation. This space efficiency is critical in campervans, where every square inch matters, allowing you to maximize usable space without compromising insulation performance.
- Wool insulation may cause allergies in some individuals due to lanolin, a natural substance found in wool. Thinsulate insulation is a synthetic material and eliminates the risk of allergic reactions.
- Thinsulate insulation is engineered to be highly durable and long-lasting. It maintains its insulating properties over time, resisting compression and settling that can occur with other insulation materials like wool.
- Pre-cut Thinsulate insulation kits offer a straightforward and hassle-free installation process. Wool has to be measured, cut, and stuffed into the interior of your van.

The Importance of Insulating Your Campervan
Is it truly necessary to insulate your campervan? What if you’re only traveling part-time or live in a generally temperate area that doesn’t get extreme weather?
Regardless of where your travels take you or how long you’re on the road, there are some things to understand about the importance of insulating your campervan.
A precut Thinsulate kit for the Mercedes Sprinter or Ford Transit is an easy way to add insulation to your DIY build.
- Temperature regulation for pets: Insulating your campervan helps regulate the internal temperature, making it more comfortable in hot and cold weather conditions. This might not be a big deal if you’re traveling by yourself, but if you have a furry companion, it’s vital to have the ability to keep your campervan comfortable for them.
- Energy efficiency: Proper insulation significantly reduces the reliance on heating and cooling systems in your campervan. By preventing heat loss or gain, insulation ensures that the interior temperature remains stable for longer periods, reducing the need for excessive energy consumption. This, in turn, increases your campervan’s energy efficiency and helps extend battery life when off-grid.
- Noise reduction: Thinsulate is excellent acoustic insulation, dampening noises from exterior elements such as traffic, rain, or wind. You’ll appreciate the noise reduction while driving and when trying to sleep during a storm or in a city.
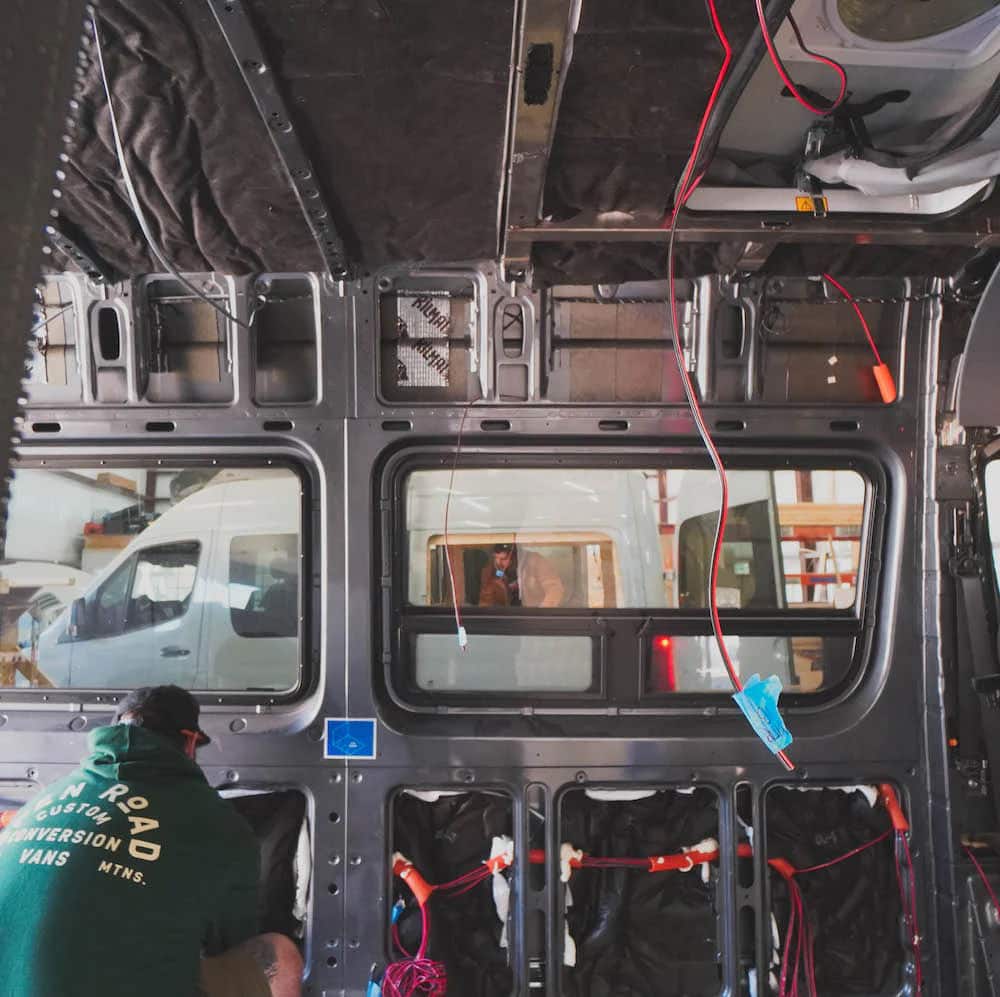
Install Your Thinsulate Insulation Kit in 5 Steps
Adding Thinsulate insulation to your DIY van conversion is incredibly simple when using a Thinsulate van insulation kit. Here are a few tips to consider and how to install insulation in your van.
1. Assess your needs
Before selecting an insulation material, consider the climate conditions you’ll encounter and your desired level of insulation.
Thinsulate insulation is suitable for various climates but may require additional layers or complementary materials in extreme conditions. This could be an additional acoustic absorption layer or vapor barrier.
2. Clean surfaces and seal gaps
Prepare the campervan by cleaning and degreasing the bare metal surfaces where the insulation will be applied. Ensure all gaps, seams, and joints are properly sealed to prevent air leaks.
3. Add a base layer
Before insulating, you may need to create a suitable base layer. Depending on your insulation needs, you might add a base of sound-dampening insulation and apply a moisture/heat-resistant coating like Lizard Skin OEM directly to the van’s bare metal walls.
4. Prepare the insulation pieces
Take the time to sort through the insulation pieces and match each with its corresponding number. Lay out the pieces and test fit each one to ensure accuracy.
5. Apply adhesive and install the Thinsulate pieces
Begin by spraying a thin, even layer of adhesive, such as 3M 90 spray adhesive, onto the van wall, ceiling, or floor and the backside of the Thinsulate piece. Allow about a minute for the adhesive to set. Place the Thinsulate piece with the black embossed side facing out.
The embossed layer acts as an extra barrier against moisture, helping to prevent the absorption of natural moisture in the air.
Once you’ve installed all the insulation pieces, you can continue with the rest of your van conversion, knowing you have a long-lasting, high-quality insulation solution in your campervan.
Watch this video of a Thinsulate van insulation installation in a Ford Transit:
Thinsulate Van Insulation Kits Make Van Conversions Quicker
Insulating your campervan is crucial in creating a comfortable and energy-efficient living space.
Thinsulate insulation offers exceptional thermal performance, moisture management, space efficiency, and easy installation, making it an ideal choice for campervan conversions.
With the convenience of Thinsulate van insulation kits, you can say goodbye to the frustration of measuring and cutting insulation pieces.
Transforming your van into a cozy and comfortable living space has never been easier. You can trust these Thinsulate kits to simplify your insulation process so you can spend less time on your build and enjoy the freedom of van life adventures sooner.
A precut Thinsulate kit for the Mercedes Sprinter or Ford Transit is an easy way to add insulation to your DIY build.

Similar Posts
Inspiring Campervans with Bathrooms for Van Build Ideas
If you want to live the van life but you’re freaked out about the bathroom situation, don’t fear! There are lots of options out there, whether you want a fully-built out wet bath, or a portable toilet and outdoor shower.
DIY Van Build: Tips from van life experts
59 shares So you want to build your own DIY campervan? This could be the year when you ditch your 9-5 job for a life…
Promaster Roof Rack: The Top 4 For a Campervan
Dodge Promaster campervans have quickly become a darling of the van life scene. Promasters are cheaper than their counterparts, the Ford Transit and Mercedes Sprinter,…
9 Space-Savvy Chevy Express Camper Builds You Can Actually Copy
The Chevy Express might not get as much attention as a Sprinter or Promaster, but it’s a solid, affordable choice for van life—especially if you’re handy or working with a budget. In this post, you’ll find 9 clever and inspiring Chevy Express van builds that show just how versatile this rig can be.
Why We Chose Lithium Batteries for Our Sprinter Van Conversion
In our last camper van conversion, a Chevy Astro van, we mounted two AGM batteries underneath the van chassis. We wanted to keep the weight…
What is the Best Oven for Van Life? Our Top 4 Picks
Looking to make baked goods inside your campervan? From the stovetop Omnia oven, to the Camp Chef oven, we’ve got you covered.