

6 Gorgeous Skylights to Turn Your Campervan Into a Stargazer’s Paradise
Adding a skylight to your campervan brings more of the great outdoors in. Here are some good ones to check out!

*This post may contain affiliate links. Please read our disclosure policy for more info.

When you’re knee-deep in your DIY campervan build, it’s easy to get caught up in the usual stuff — bed design, kitchen layout, water tanks, storage. But there’s one feature that doesn’t get nearly enough love… and it can totally elevate your van life experience.
We’re talking skylights. Not just for gazing at stars (although yes, that’s magical) — they can add natural light, ventilation, headroom, and a feeling of spaciousness you didn’t know was possible in a van.
In this post, we’re sharing why skylights are a game-changer, how to choose the right one, and a few of the best options out there for your Sprinter, ProMaster, or Transit.
Why Install a Van Skylight?
There are tons of good reasons for making a van skylight part of your DIY camper van conversion. In fact, the more you think about it, the more likely you’ll be to wonder why you wouldn’t install a skylight!
For starters, even the most spacious van conversion can feel a bit stuffy from time to time. Even if you’ve installed a roof vent fan, the air inside your van might be a little stale. Since adding fresh air and natural light to the equation can make a huge difference, a skylight can bring a lot of benefits. Here are a few reasons why you might want to install a van skylight:
- Perfect stealth window. If you plan on doing a lot of stealth camping in your van, you probably won’t be installing many windows. Fortunately, van skylights are perfect for this kind of conversion. You’ll be able to let in air and light without calling attention to yourself, and you’ll feel safe and secure into the bargain.
- Create a cross breeze. Lots of van lifers install a rooftop vent fan in their DIY conversions. However, adding a skylight at the other end of your van can help create a powerful cross breeze. In fact, you might never need your van air conditioner with this setup.
- Reduce energy consumption. As we just mentioned, installing a van skylight can drastically reduce your air conditioner usage. That’ll definitely help out your batteries on hot days. What’s more, the natural light you’ll get from a skylight means you won’t always have to rely on interior lights, especially in a stealth camper van.
- Sense of space. As well as increasing the amount of natural light in your camper van, a skylight can create the illusion of extra space. Plus, you’ll be able to stargaze from your bed without compromising your security.
- Emergency exit. While it’s unlikely you’ll need to use a skylight this way, it’s a great option. If, for whatever reason you need to make a quick escape, simply open the skylight all the way and clamber out. You might also end up using the skylight as a way to access your van’s roof to monitor solar panels or just hang out!
7 Van Skylights for Letting the Sunlight (and Moonlight!) In

Now that we’ve established how awesome van skylights are, let’s take a look at a few examples. We’ve found five van skylights, which we have arranged in order of price- though each certainly has it’s own features and has earned its spot on the list.
Dometic Micro Heki

If you’re planning on building out a camper van with a bathroom, this little guy is definitely worth considering. For starters, the Dometic Micro Heki measures just 11 inches by 11 inches, so it won’t take up much roof space. What’s more, the double glazed glass dome opens to 50 degrees, allowing your bathroom to stay dry and ventilated.
There’s a neat locking mechanism, which means you won’t worry about the wind damaging your skylight, and you can buy the Micro Heki with or without forced ventilation. As with other Dometic skylights, there’s a built-in fly screen, and you can also configure the Micro Heki with a retractable blackout shade.
Dometic Heki Mini Plus
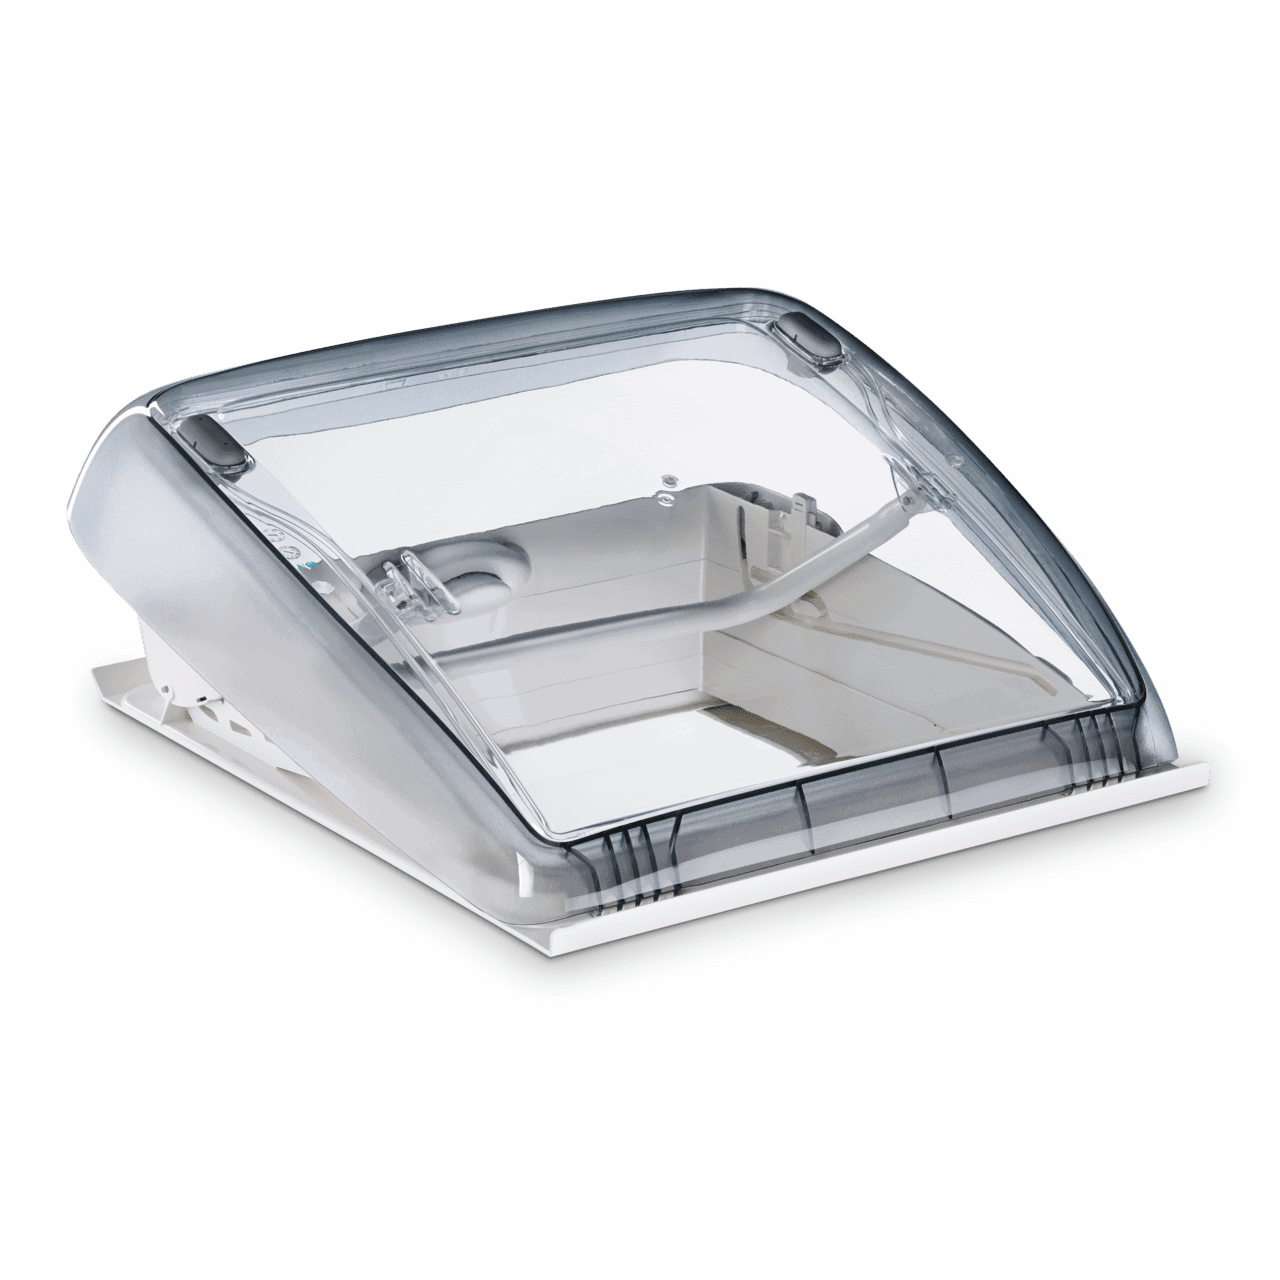
The Dometic Heki Mini Plus is one of the most popular van skylights around, and it’s easy to see why. A good step up from the Micro Heki, the Mini costs around $230 and is fairly straightforward to install. Measuring 20 inches across, the Mini Heki Plus van skylight is compact and super sturdy. You can choose between three positions- fully open, partially open, and a bad weather position. In the latter case, the acrylic dome prevents water from getting in your van.
Thanks to its manual lever operation, using the Heki Mini Plus is a piece of cake. Best of all, there’s a retractable bug screen on one side and a blackout shade on the other. Finally, this van skylight has forced ventilation, which means it keeps your van both light and airy.
ICON Technologies SL2649 Skylight

We absolutely love this huge camper van skylight — it brings in so much light and bumps up the ceiling space for over FOUR FEET down the length of your rig! If you’re hoping for bigger or smaller dimensions to fit your rig, they also have a variety of other sizes and shapes.
The Icon SL2649 Skylight ranges in the middle of this list’s price range, coming into your cart at around $400. Offered tinted or not, the large durable dome is made of Impact-Resistant Polycarbonate and is made in North America. While it doesn’t open to allow extra airflow, it is a great option for adding another few inches of headspace to your galley while also allowing you to soak up all the views.
Lewmar Low-Profile Hatch
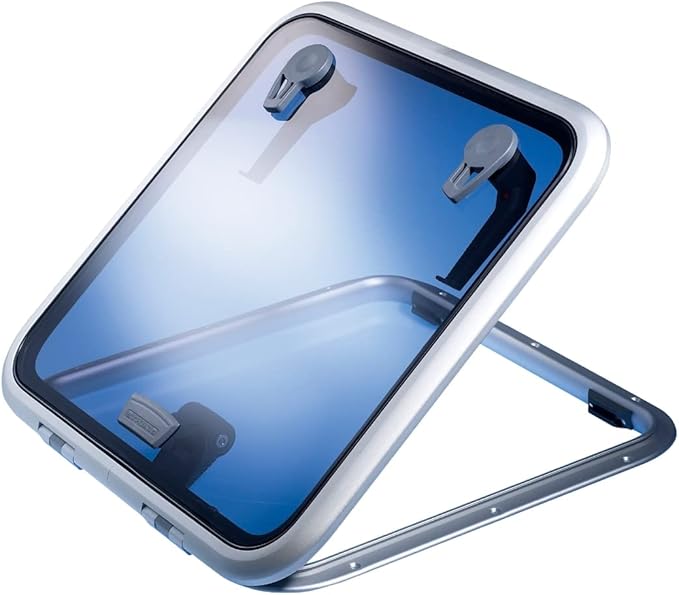
A perfect combination of skylight with innovation- the Lewmar Low-Profile Hatch is actually made for marine use, but has been growing in popularity over the years for RV Skylights and Escape/Roof Access Hatches. With multiple size options, there’s definitely a perfect fit for you. Sprinter and Transit owners have reported using the size 40 option to fit between the ribs of their vans.
With over seven decades in business, they are well versed in leading innovation throughout the RV and Marine communities, and they have certainly delivered. The friction levers allow the hatch to open up to 95°. Its anodized aluminum frame makes it corrosion-resistant and easy to install. While most skylights don’t offer the perfect combination of size, style, and opening range, the Lewmar Low-Profile Hatch checks all those boxes!
TrueVan Roof Hatch Skylight
Measuring approximately 26 inches by 15 inches, the TrueVan Roof Hatch Skylight is an absolutely beautiful option for allowing light and fresh air in while being able to let yourself out, for those days when you need to check out your solar or just enjoy the views from the roof.
Combining all of the best features, it opens fully, has a mesh bug screen, a blackout privacy screen, and includes built in LED lights to illuminate the interior at a moment’s notice. Even with it closed, star and tree canopy gazing are top tier and allow plenty of natural light in.
Dometic MIDI Heki LED

Measuring a generous 28 inches by 20 inches, the Dometic MIDI Heki LED is one of the newest offerings from this well-respected manufacturer.
Like other Dometic skylights, the MIDI Heki LED features a push bar operation, making it really easy to use. As well as opening to a maximum of 45 degrees, this skylight features improved aerodynamics that cut down on noise while driving.
The MIDI Heki LED has retractable blackout and bug screens, but what really makes it stand out is the inclusion of cool LED lights. You can choose between bright white lights and cool blue LEDs. The latter is ideal for those times when you need to find your way in the dark without waking your partner or drawing too much attention to your campervan. Plus, the soft blue light creates a cozy, atmospheric feel in your home-on-wheels!
How To Choose a Van Skylight
As we’ve seen, there are loads of skylight options, all of which vary in size, price, and features. With that in mind, you’ll need to think carefully about what you need before committing to a specific model. Here are a few pointers to keep in mind:
- Price. It almost goes without saying that your budget will play a big part in which skylight you end up buying. While you can find budget-friendly models, you may have to sacrifice some functionality. On the other hand, it might be worth investing more if you’ll be living in your camper van full time.
- Build quality. While it might be tempting to opt for a bargain basement van skylight, the materials used might not be up to snuff. Honestly, we’d recommend investing a little more to get something durable that’ll stand the test of time.
- Installation. The majority of van skylights we’ve talked about in this article are fairly easy to install as part of a DIY Van conversion. In the best-case scenario you’ll just need a drill, jigsaw, and some sealant for installation. Still, depending on your van’s roof, installing some skylights might require additional parts, so make sure you’re aware of what’s needed.
- Size and location. Choosing a suitable size of van skylight is essential, especially if your roof space is limited. If you plan on installing solar panels, storage racks, or even a deck up there, you’ll need to plan carefully. Also consider where you’ll want the skylight — this is especially important if you want to use it in combination with a vent fan.
- Special features. You might just want a simple skylight that opens and closes, in which case a budget-friendly model will suffice. However, it might be worth spending more if you’d like multiple opening positions, retractable screens, and LED lights.
Tips for Installing a Van Skylight
We aren’t about to give you an in-depth tutorial on how to install a van skylight, but we can share a few tips and pointers. While you won’t need a ton of professional tools, there are some things that are essential:
- Drill
- Jigsaw
- Mastic tape
- Sealant
It’s always a good idea to install your skylight before installing insulation and ceiling panels. Plus, you’ll want to make sure you’ve taken precise measurements for where the skylight will go. That’s especially important if you’re also going to have solar panels and other stuff on the roof.
Once you’ve cut the hole for your skylight, making the edges as smooth and level as possible is super important. That way you’ll get a good seal.
Another important thing to achieve is a level surface. Otherwise, you’ll have problems adhering the skylight to your roof and risk leakage. That’s where Mastic tape comes in — you can use it to create a level surface if your van’s roof isn’t flat.
For a more in-depth guide to installing a van skylight, check out this fantastic YouTube video by a DIY van life couple:
We hope you’ve found this guide to van skylights useful. Feel free to leave any questions or suggestions in the comments section!


