

Flarespace Review: How We DIY’d our Sprinter Van Flares in 5 Steps
121 shares When I first saw the Sprinter van flares manufactured by Flarespace I totally fell in love. What a great way to get extra…

*This post may contain affiliate links. Please read our disclosure policy for more info.
When I first saw the Sprinter van flares manufactured by
Sprinter van
I knew space would be a premium in our 144 wb Sprinter van, which is why I contacted
SPOILER ALERT: We absolutely love the
Watch the video:
Why get Flaresapce Sprinter van flares?
Adding a driver side and passenger side flare to a campervan might seem like a big waste of money to some people. The Flarespace flares, interior kit and trim rings, plus the Super Fly Weight bed system will set you back almost $5,000 and even more if you get a professional installation.

Why not just buy a longer van?
We really wanted the short-wheelbase Sprinter van, the 144, as it’s easy to park, drive, maneuver and is better for off-roading. The smaller the wheelbase, the more rugged roads we could take on. Plus, coming from a Chevy Astro, the 144 wb van seemed big enough.
Some people will opt for the 170 wheelbase Sprinter, which does provide more space for a length-wise bed. However, at this point in my life, I didn’t feel like I needed such a long van.
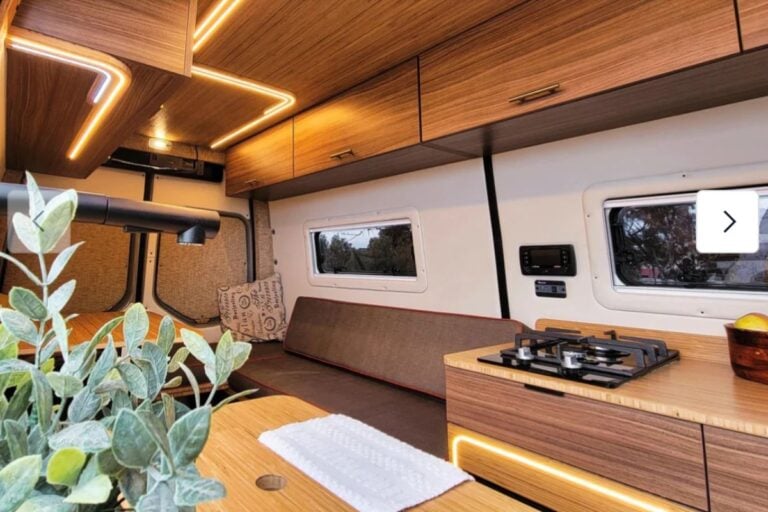
Flarespace Sprinter van flares are perfect for sleeping sideways, or horizontally, across your van. This gives you additional space inside for your kitchen unit, bench seats, bathroom or whatever you want to install.
Sprinter van flares were the first thing I wanted in my van build.
Keep in mind that if you have two people sleeping sideways in a Sprinter van, one person will always have to crawl over another person to get out of bed. For some people, this is a definite “No”, where it’s not a big deal for me.
Choosing the Right Flarespace Flare and Window Combination
When you first look at the
Flares are automatically sold in pairs, but then you have a few choices. The driver side flare has more options because you aren’t constricted by the slider door. You’ll have to choose between regular and extended depth flares. The extended depth adds 1-2″ more to the length of your bed – better if you’re tall.
The passenger side flare only comes in the regular depth option to ensure the sliding door can open fully.
You’ll then need to select which window you want in your flares if any. Keep in mind that having an awning window on your sliding door side flare can be dangerous. If you accidentally leave the awning open, the sliding dor will hit it.
Here are the window options:
- Flarespace half-slider window
- Flarespace awning window
- Arctic Tern awning window
- No windows at all
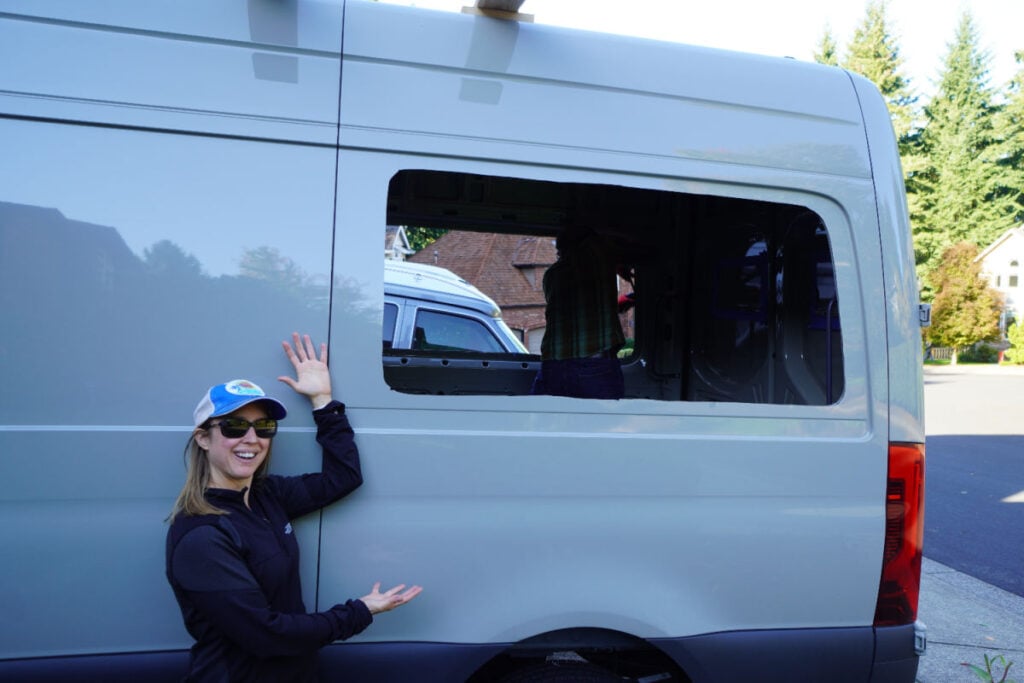
We went with the half-slider These windows come with an awesome insulated, magnetized window shade by window for our Sprinter van, which is made by C.R. Lawrence. They also have a bug screen (as do the other shades) and are nicely tinted.
The Arctic Tern window is the only acrylic window you can get with your
Add-Ons We Got with our Flarespace Sprinter Van Flares
Along with the actual
Trim Rings

The first add-on I’m really glad we got were the trim rings. Trim rings provide a windowsill around your flare and give it a finished look. Trim rings are sold in pairs and are made of molded fiberglass meant to fit just inside your flare.
You can either paint them or wrap them with foam and fabric. We choose to paint-match them to our Sprinter van and flares.
Interior Finish Kit
Another add-on we received was the interior finish kit for our Sprinter campervan flares. This adds the perfect finishing touch to the inside of our flares, and was way better than going out and choosing the foam and fabric ourselves.
Here’s what you get the interior finish kit:
- gray Marathon fabric
- spray adhesive
- 1/4″ foam
- enough material to finish both of your flares
There are some other products you can purchase from
DIY Flarespace Install in 6 Steps
We decided to do our own
This was Tom’s first time tackling a project of this nature and he did an incredible job. He is super handy and has been building stuff his entire life, which I’m sure contributed to the Sprinter van flare installation success.
Here are the tools you’ll need for a DIY
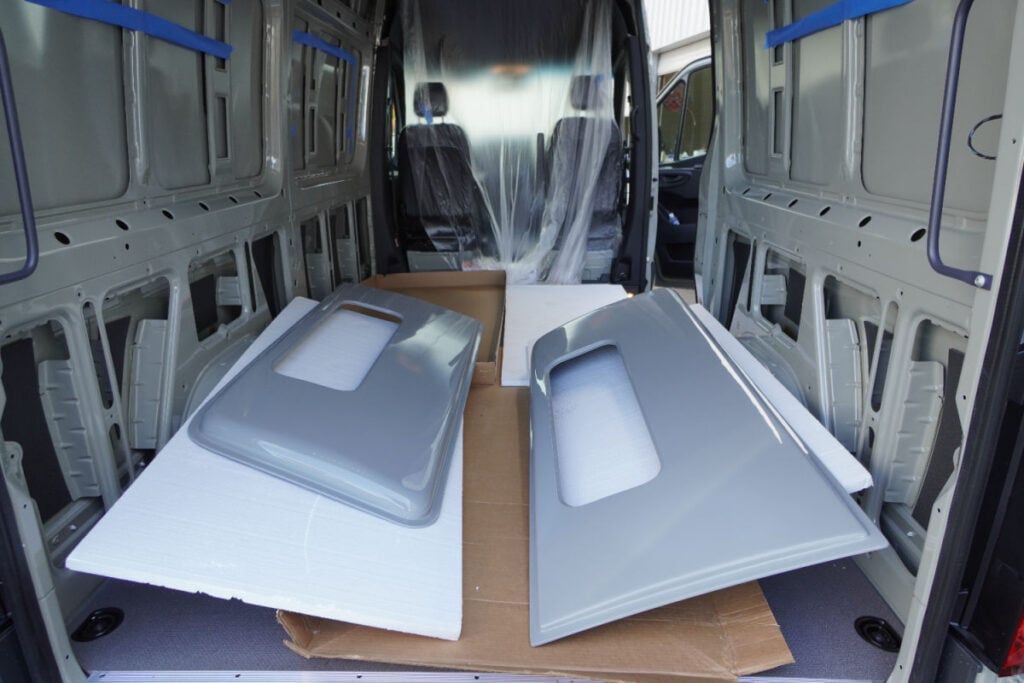
#1 Make Sure the Flarespace Sprinter Van Flares Fit
Since making flares involves molds and isn’t a perfect process, it’s important to make sure they fit before you install Flarespace flares in your campervan.

When we fitted the flares by holding them up to our Mercedes Sprinter, we immediately noticed that the window holes on our flares didn’t match. One was for the half-slider and one was for the awning-style window. We wrote
Both
#2 Paint Match Your Flarespace Flares
The next step in the flare install was getting the flares painted to match our van. After calling several body shops that said they don’t work on fiberglass, we finally found one called Precision Auto Body located in Beaverton, Oregon.
Painting both flares cost $750, and we also opted to have them paint our interior trim rings. The auto body shop completed the work in about five days with an excellent paint job.
The painters had to mix the paint, and it came out a little off, but not off enough to be a problem. The paint is glossy and gorgeous, and we were overall very happy with the finished product.
If you don’t want to pay a professional auto body shop to paint your body flares,
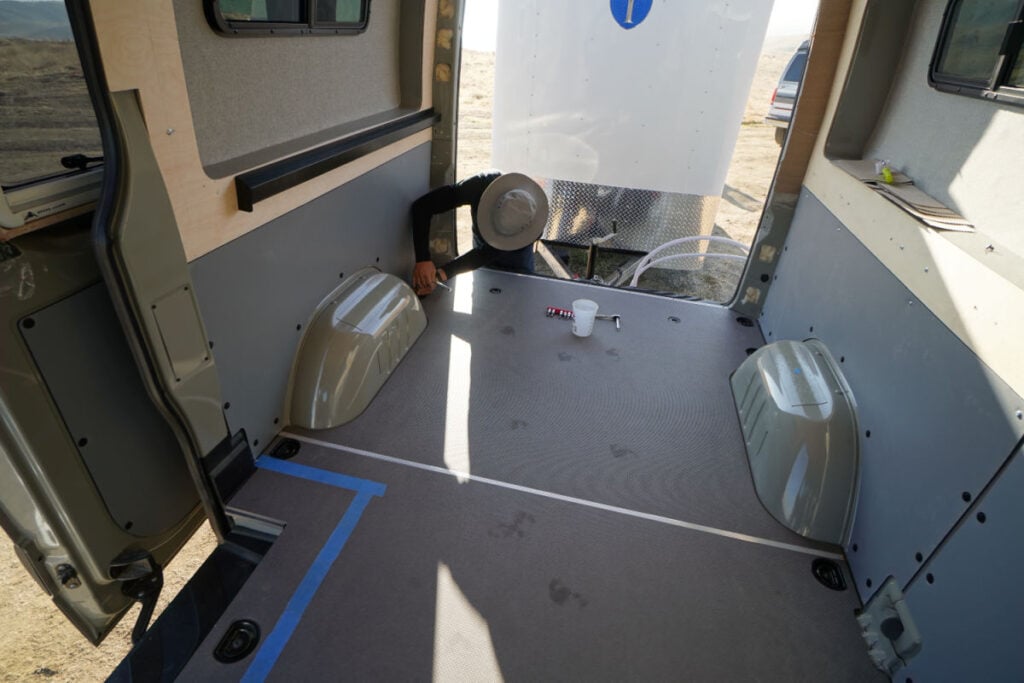
#3 Cut Holes in Your Van
Yep, the next big step in a
Tom precisely measured the cutouts he’d make in our Mercedes Sprinter 144 and created an outline with blue tape. He then punctured the four corners with a drill so he’d have a place to put his jigsaw. Then, slowly but surely, he cut the holes.
After cutting, Tom filed off sharp edges and sprayed metal primer to prevent future rust.
#4 Glue the Flares into your Campervan
It might seem weird that glue is the only thing holding your body flares in place, but that’s what

I held the flare while Tom pushed it into place, then used long strips of blue tape to secure the piece until the glue had a chance to dry. We also added glue to the inside of the flange to prevent leaks.
Flarespace recommends the glue cure in 60 degrees, but we didn’t have that luxury in the fall in Portland, Oregon. We added bright and hot shop lights to the van’s interior to help keep the temperature up throughout the night.
And it worked! Even though temperatures dipped to the low 50s, the glue cured just fine.
#5 Finish the Flarespace flare interior
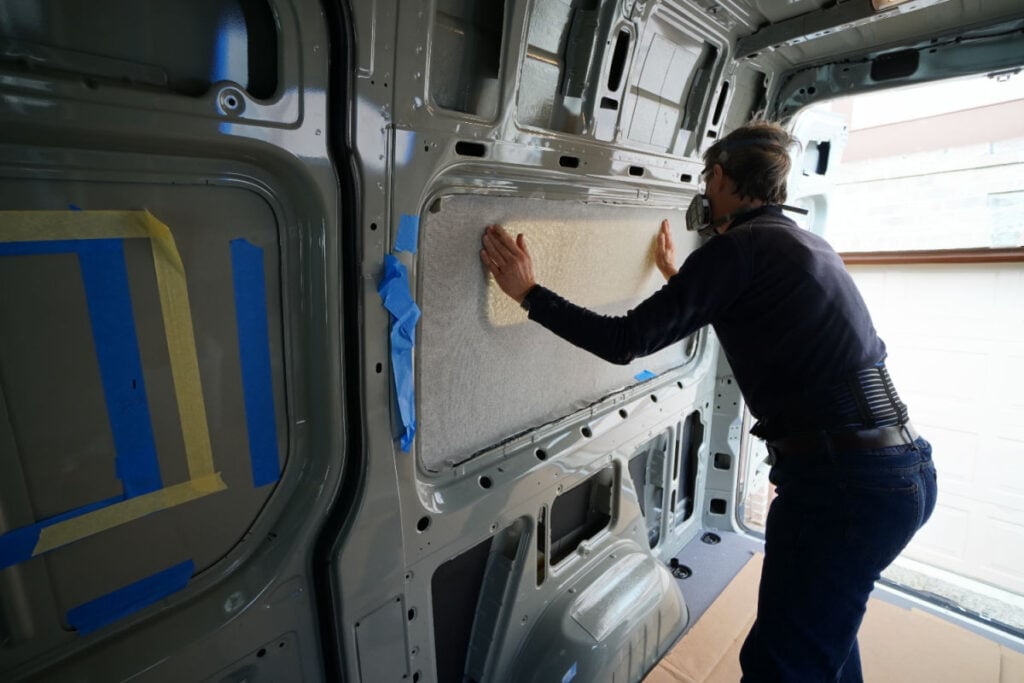
After the body flares and windows were installed, it was time to finish out the flare interior. As part of our partnership,
To install the interior kit, we sprayed down the inside of the flare with adhesive, then glued 1/4″ foam. Tom cut the foam to shape, then sprayed again and laid down the gray Marathon fabric, which we also had to cut to fit.
#5 Install the Windows

The last step of this process was installing the half-slider windows into the flares in our Mercedes Sprinter 144.
This was probably the easiest part of our
You can find detailed written instructions here for a DIY flare installation.
Installing the Super Fly Weight Anti-Gravity Bed Panel System
Flarespace has a new product out that’s an ultra-lightweight bed system. When I saw it on their website, I knew I wanted it for our Sprinter campervan. We are trying to keep our weight as low as possible so we can off-road a bit easier.
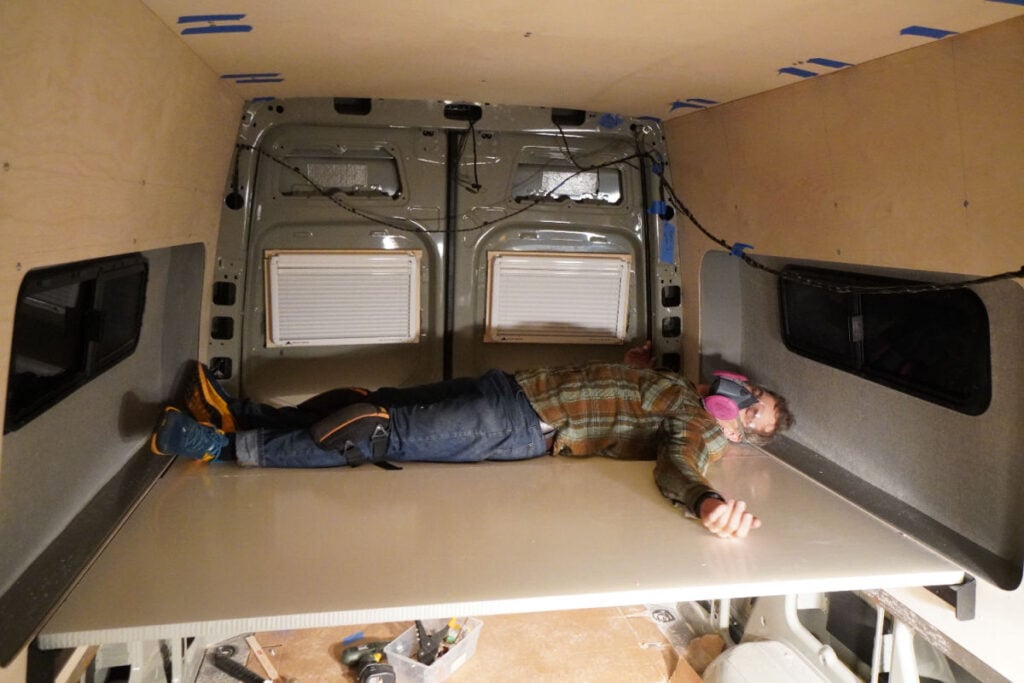
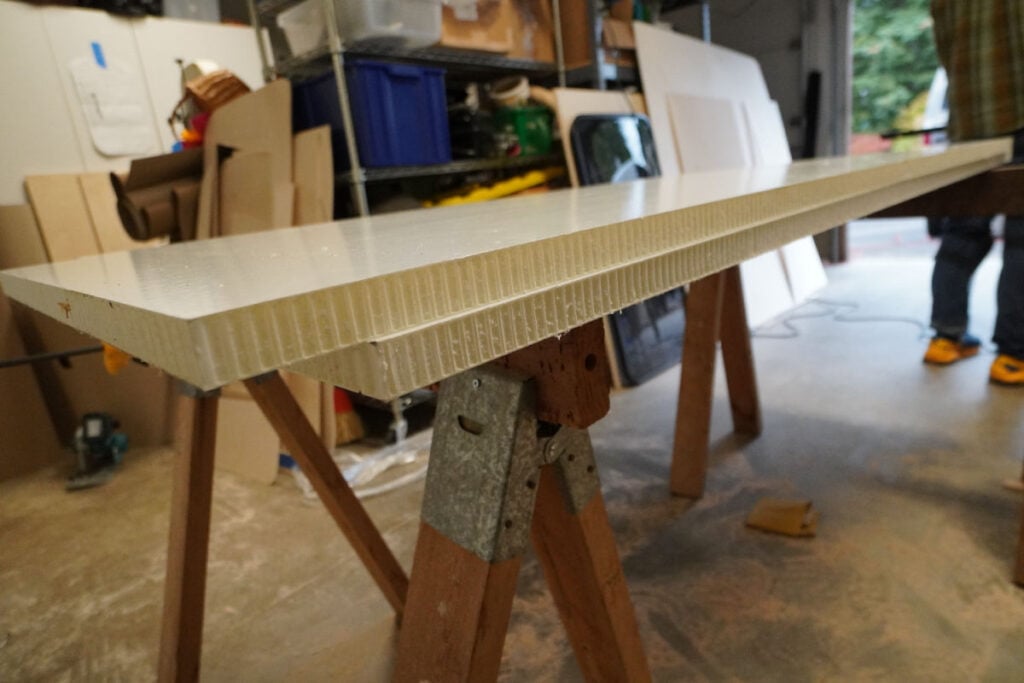
The Super Fly Weight Anti-Gravity Bed Panel System consists of two 30″ wide 1″ thick panels. Also included are six powder-coated bed rail brackets, 14-gauge sheet metal for structural support and all hardware you’ll need for installation.
These
Here are the steps it took to install the Super Fly Weight bed system in our 144 wb Sprinter van. Keep in mind that
#1 Drill and Rivet Your Structural Steel in Place
As part of the Super Flyweight
Don’t forget to spray Rustoleum into any newly drilled holes in your van to prevent rust.
#2 Cut and Install Rear Wall Quarter Panels and Trim Rings
For us to put our bed system in place, we had to cut and install 1/4″ Baltic birch rear panels. This step needs to happen to pinch the Flare trim rings in place and to also serve as an anchor point for the van bed’s hardware.

To cut our rear panel walls, we used paper template kits from Titan vans. If you don’t want to cut your own panels, you can purchase pre-cut wood panels from Titan vans as well.
The trims rings are an important part of this entire process. Premade trim rings cut down significantly on the time it would take us to finish out the van’s interior. Trim rings are cut wide to fit any type of furring you might do with your walls. This leaves space for extra installation.
Tom grinded and sanded the trim rings down to fit our particular wall thickness.
Flarespace trim rings are held in place using Baltic Birch wall paneling.
#3 Add the bed rail brackets
After the structural steel and wood back paneling was installed, we then added the two powder-coated bed rail brackets. This is where the two 30″ bed pieces will rest.
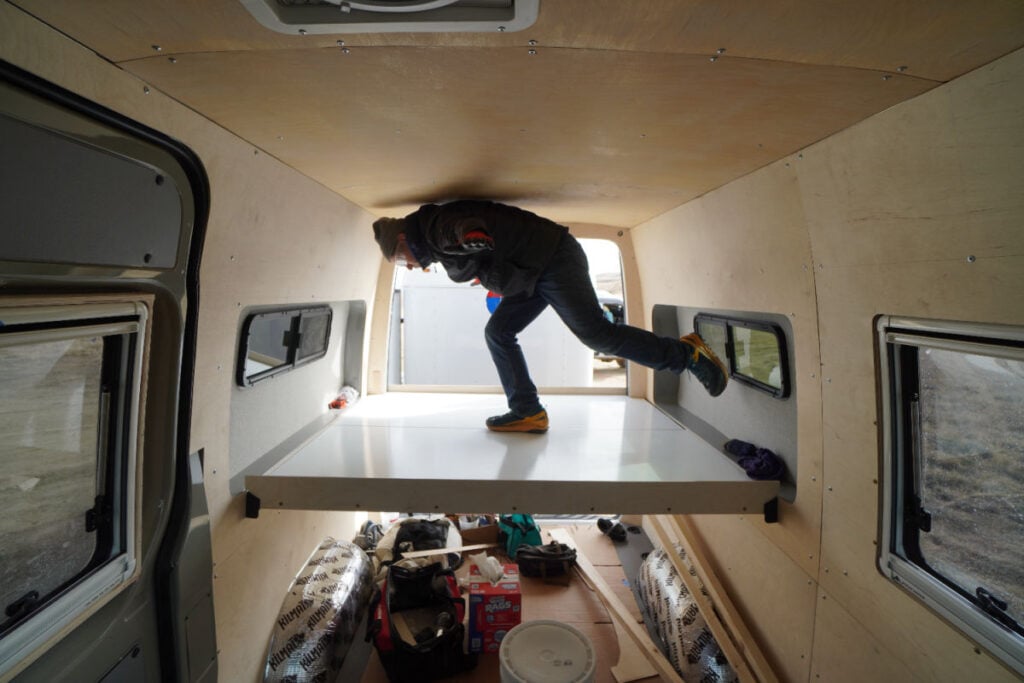
#4 Trim the bed panels
Like other
To fit both panels in the back of our van, we had to trim them down a bit to ensure an even fit. Then our bed was in and we were almost ready to sleep sideways in our Sprinter van! A huge step in our van build process.
Strengthening the Flarespace bed system
One thing we noticed about the Super Fly Weight Anti-Gravity Bed Panel System is that the panels bend and sag a bit under our weight. While this is fine for some people, we prefer a very firm bed.
Tom came up with a solution to strengthen the two panels.
He created a fiddle made out of Baltic birch for the front and back of the bed system that would act as structural support, and a way to hold our blankets in place.
Then he added a piece of metal and Baltic birch in between the two bed panels to act as a beam. Together, the fiddles and beam made a truly firm and fixed bed, one that doesn’t move around one bit.
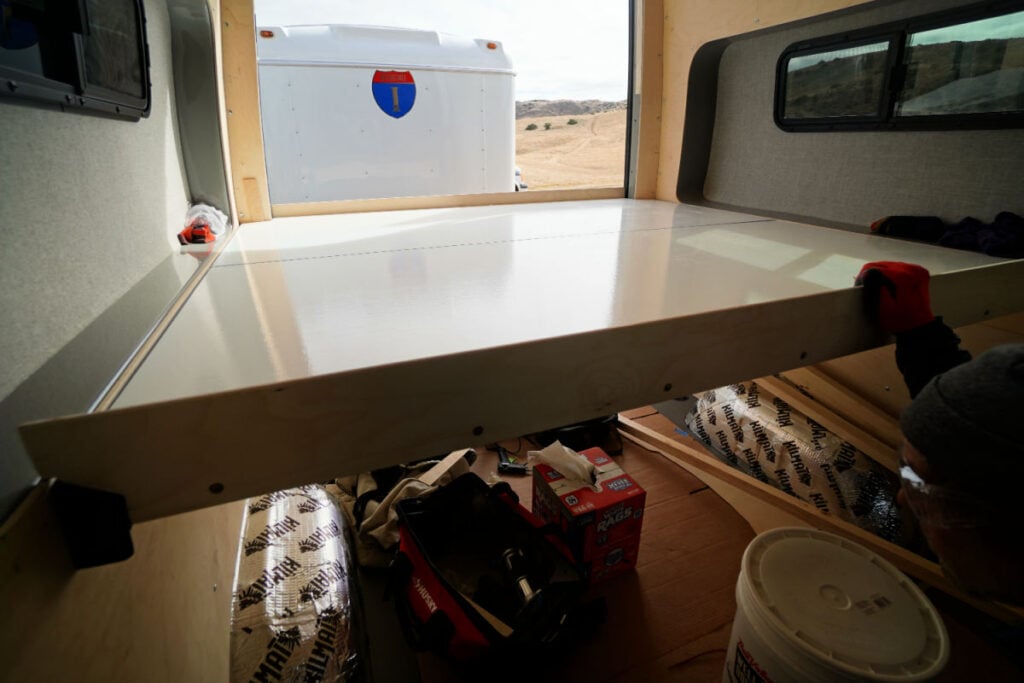
We love that there are two independent panels, with means when one person moves, the other person doesn’t feel it.
The Verdict on Flarespace Sprinter Van Flares and Bed System
We have been really impressed with the quality of the Sprinter van flares from

The body flares not only look amazing from the outside but provide more usable space inside our 144 wb Sprinter van.
I absolutely love the bed and think it’s the most comfortable I’ve ever slept in. We can sleep sideways with ease in our Mercedes Sprinter. I love that each of us has our own bed panel so that when one person moves, the other doesn’t really feel it.
Even when we’ve been invited to sleep inside at fancy resorts, we prefer to go out in the parking lot and sleep in the Sprinter van.
Over and over again, we talk about how much we love the
Flarespace Sprinter van flares might not be right for you if you don’t want to crawl over another person to get out of bed. They also might not be right if you don’t want to spend quite a bit of money on your van’s sleeping system. Plenty of people do just fine with a length-wise bed.
You can check out the Flarespace flares here.
Did you try Sprinter van flares? What did you think?
Other Sprinter van build stories to check out:


Great write-up on the Flarespace and bed system! What mattress did you end up going with? We’ve tried a few different ones in ours and have not found a super comfortable one yet.
Thanks!
Hi Brian! We are still using camping mats, haha! But we LOVE the 3-inch foam from Sailrite so will order some when we are back in the states next summer, and then we will cut it to size.
What’s the height of clearance under the bed? Looking at fitting bikes underneath
I bet you could fit bikes if you took the front tire off!
Did you notice any negative effects in gas mileage or handling after the flares were added?
I didn’t notice this!
What about ventilation under the mattress. Most everything I’ve read recommends providing a path for airflow between the mattress and bed frame to prevent mold and mildew. It appears this is a solid surface with no air flow channels.
Hey Bret. We haven’t had any issues with this so far. We use a very thin mattress (3″ of sailrite foam) and haven’t had any condensation or mildew.
Love your post about flares. Thanks. I’m curious how tall you are – we are looking to get a 144 and sleep sideways with flares. I, 6’1”.
Hi! I am 5’4 and my partner Tom is 5’11. However, I saw a taller man get into a van with Flares and he fit! I think he was 6’1 or 6’2